Image editing is not about "fixing" some mistakes omitted during the photo shoot, and it’s not about other details that got "out of control".
Photo retouching "talks" about your products, like no one else can. Photo retouching (“retouching”) defines the product and the brand it represents. It brings your images to the focus center of your viewer's optical nerve creating sensations and feelings that only visual masterpieces can do. And most of the time, when we talk about food images it connects to your other senses.
Therefore, if you are a chef, a restaurant owner, or just a food enthusiast when you get to decide who will take the photos for your new project and who will retouch them, you need to be careful who you work with. You need to be sure if that person/s has the experience if they are attentive to the image chromatics, and if their images are putting your plates and dishes into the light.
In today’s blog post, we are talking about food photography, considered by us a true art form, that requires a lot of attention to small details. Working with food may seem easy, but only think about what it takes to photograph a series of ice creams or a type of food that can alter quickly… Well, practice is harder than theory, and that's why today we come up with a series of tips and tricks on how to avoid a few mistakes when doing food photography.
# 1 Choose the right angle
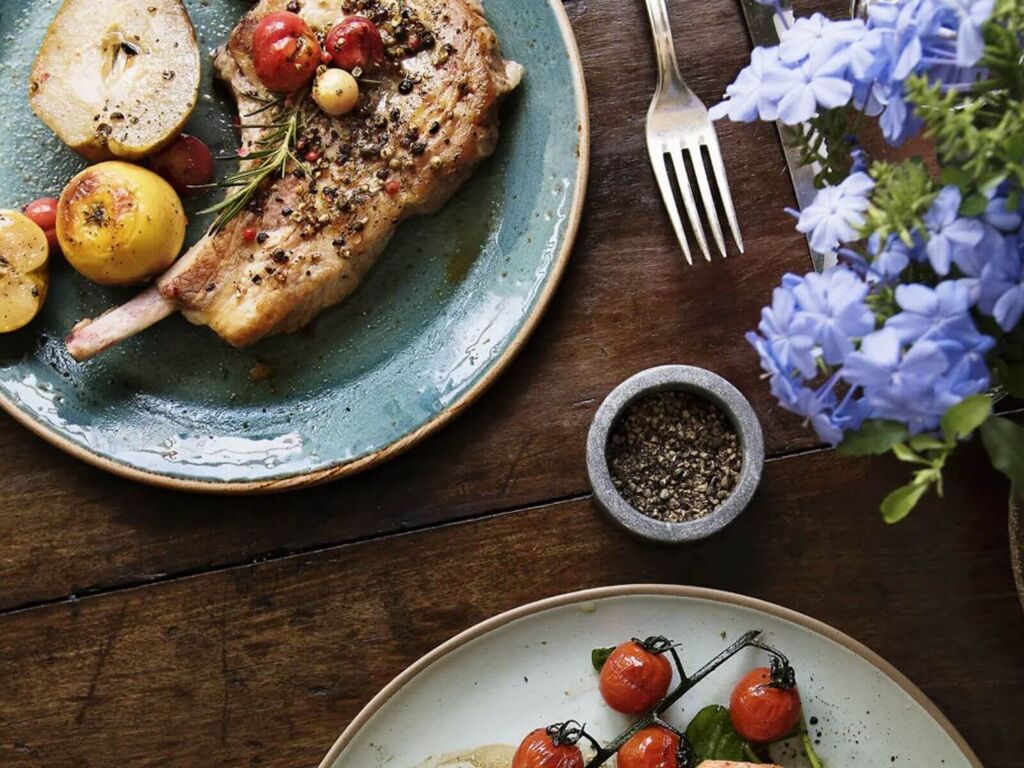
Make conscious decisions. The position in which you place the camera to photograph a specific type of food can drastically influence the result. Some dishes look great when photographed from the front, and other angles are more appropriate when viewed from above the table. You also have to be extra careful with the photography lights that you use.


Credits: Photo 33088373 © Loonara - Dreamstime.com
Highlight the most exceptional and handsome detail of that type of food, even if this is a leaf that gives a splash of color to the dish. Where you place the camera will affect the type of story you are trying to tell.
Create a small "map" in advance to guide you.
Size, shape, height, then place the camera where you think it best highlights the dish’s strength.
# 2 Props
Use the ingredients with which the product was prepared, to create an experience as explicit as possible to the viewer. When you are photographing in front of the food, try to also keep in focus the background that you play with. Use these empty spaces to tell more of your story. Surround the main dish with ingredients and props with which the dish was cooked, from ingredients, sauces, oils, and cooking utensils, to the side dishes that work with your main dish.

Canned food, jars, herbs, glasses, and fabrics can talk about the origin of the dish or the season in which it is served. Placing some of them in the foreground and background will help your image tell the desired story.
# 3 Natural light
A dim light will negatively affect the image’s appearance, leading to a not at all, "appetizing" result. At the same time, direct natural light can provide harsh shadows. Use a light diffuser if you choose to use natural light. You know, when you work with direct sunlight, a light diffuser will greatly improve the quality of your photo.
# 4 Lines
Use props and ingredients. We know, you will say, "Well, with all these products and props in the frame, how will the dish stand out?" Well, be confident and use the techniques of composing with lines and layers to create various effects that will delight the viewer's eyes. You can use different props to create lines. From spoons that direct the viewer to look directly at the plate of food, to towels and other items that match the color setup and the scene setup in which the food was prepared. Shooting from above always offers more graphic possibilities, so there are chances to create great lines that naturally frame the subject. Layered image compositions will always look good. Also, use the camera's focus to create "mystery" and story. Let the viewer create images in his mind about the place where the photos were taken. Do not hesitate to dare!
# 5 Chromatic
Finding props, backgrounds, candy cutlery to use in the images you will take, can be the most interesting and creative part of a photo-shoot. It's cool to have colorful props but you have to be very careful and establish from the beginning with the manager of the brand for which you take the photos, what are the types of food, what they look like in their final form, what are the ingredients used to prepare them and if they can be transformed in others.
Instead of overloading the photo, we recommend using a white background image.
So, pay close attention to what type of props you use in such a way that the food stands out, and the props are just for decoration and to fit the final product nicely.
Do you need a food photographer?
Test our skills in photography and image editing for free!
Do you have any additional tips to share with us?
Please share your advice with us on Facebook or Instagram.
If you want to know more about what we do, check out our Services page.


